Saturday, January 15, 2011

Design Plan for the Nursery


More than a year ago, I started getting really excited about designing the nursery. I think my discovery of Ohdeedoh and Inhabitots fueled my designing-for-baby fire. I started seeing fabulous, creative nurseries and children's rooms featured on Ohdeedoh and eco-friendly, modern designs in furniture, clothing, toys, and other products on both Ohdeedoh and Inhabitots.

I already knew then that I wanted to create a gender-neutral space for baby that wasn't pastel in color, but I also did not want a nursery-in-a-bag design purchased from a department store or Babies-R-Us. I'm still sticking with this plan and I'm thinking that I don't want to know the sex of my child until after he or she is born. I may change my mind on this one, but I know I want to create a space that is not overtly boy or girl. If I have a girl and she decides that pink is her favorite color, we will then paint the walls, furniture, etc... pink. And if it is a boy and he wants pink I have no problem with him having a pink room.

I want to design a colorful, playful, unique space for my baby that will take him or her into toddlerhood and maybe even to preschool and beyond. Seeing all of the great rooms and products on Ohdeedoh and Inhabitots had provided me with a lot of inspiration and shown me that creating the nursery of my dreams is possible.

I quickly became fixated on creating a woodland-themed nursery, a theme that is very popular right now. I love animals for the nursery, and I love the idea of using animals that can actually be seen (or that at least exist) in my part of the world. For example, squirrels, owls, songbirds, foxes, rabbits, etc...


While browsing through the baby items on Etsy, I found this beautiful bird quilt at Tanneicasey that was made using calico fabrics from the 1970's (the opening photo is a close-up of the quilt). It is colorful, features some woodland critters, and it was made using vintage fabrics, which makes it an eco-friendly option. I bought it immediately, and it has guided the design for the nursery: I will combine the woodland theme with a primary and secondary color scheme that incorporates vintage calico/patchwork fabrics circa the 1960's and 1970's.

Etsy, Ebay, and local thrift/antique stores have provided me with an ever-expanding collection of items to use in the nursery, including vintage fabric, vintage framed crewel artwork and kits, and other accessories.


Someone with sewing skills will have to help me turn these vintage fabrics into pillows, curtains, floor cushions, etc...


I outbid a couple of people on Ebay for this cutie. I can't remember how much I bid, but I know it was under $15. It is a vintage sew-and-stuff pillow. Maybe with a little guidance I can sew and stuff it myself. It is not really a woodland creature, but I love cats and the baby will have to interact with the cat that is roaming our house.


How cute is this train? The fabrics are perfect. Each section of the train snaps together to the next, so this can even become a toy for baby later. I think I got this on Ebay for about $10.


I could not resist this colorful afghan at less than $4 at the thrift store. It is in good condition and doesn't have that terrible, musty smell a lot of linens found in thrift stores have.


As you can see, I went a little crazy with the vintage crewel and embroidery. Three of them are kits, and I cannot do needlework to save my life. My mom and aunt are both good at cross-stitching (my aunt can knit as well), so hopefully they will contribute their skills. I am at least going to attempt to learn before it is all said and done.


I picked up this chest of drawers along with a matching dresser at a thrift store a few years ago for only $75. They were in our bedroom until last year. I plan on stripping the paint (could be lead in there) and refinishing them with white, environmentally-friendly paint. I don't know if I will paint them entirely white or maintain the brown, woodlike finish on the tops and legs. I've even considered encasing everything but the drawers in brown. The dresser will also serve as the baby's changing table.

Now I just have to clean out that room so I can move ahead with the design.

Wednesday, January 12, 2011

Elizabeth Anne Designs Blog and Simply Bloom Photography


I visited the Elizabeth Anne Designs blog this morning and found this beautiful wedding, which reminded me a bit of my own wedding. I love the bride's dress and headpiece. They are my dress and headpiece just taken up a glamorous notch. If I could go back and do it again, I would wear somthing more like this instead.

My wedding was a simple affair. I wanted it to be casual, not too fancy and stuffy, so my guests could have a wonderful time. Everyone had an amazing time, but again, if I could go back and do it again, I would glam myself up just a tad.

The beautiful photograph above was taken by Simply Bloom Photography, which is located right here in Huntsville, Alabama.

Lee and I never got around to getting engagement photos made, so I am going to try my best to talk him into letting Simply Bloom do a shoot for us before we make any more additions to our family.

I love all of the sweet, creative engagement photos that are featured on wedding blogs like Elizabeth Anne Designs, and I really want (are you reading this honey) some great, professional shots of Lee and I together. Simply Bloom does on-location shooting, so I'm thinking Rainbow Mountain here in Madison would be a great spot. What to wear, though?

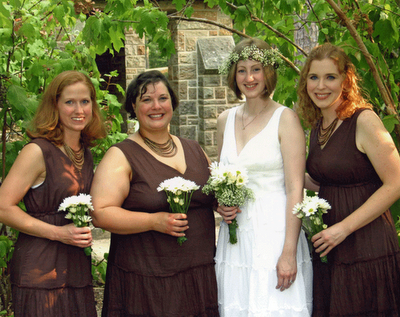
Here are a couple of photos from my wedding. My cousin Rob took the photos and did a wonderful job. He is now running another successful business, so I'm pretty sure he's out of the wedding photography circuit.


My wedding dress(just an off-the-clearance rack sundress) cost me about $50 from a department store. The bridesmaids dresses were found at CATO for less than $30. I know my parents are thankful I didn't clear out their bank account for my wedding. They wanted me to have just what I wanted, and I pretty much got it for under $5000 for a three-day, destination wedding right here in Alabama. This included everything...attire, food, decorations, and accomodations for everyone in the wedding party.


If you do go over to Elizabeth Ann Designs to take a peek at this wedding, check out the amazing bridesmaid ensembles. I would not have thought to use colors so close to white, but it works wonderfully.

I also love that many of the wedding details are diy. I think that by putting as much of yourself into your wedding, with the help of family and friends, makes it an extra special affair. I designed my own wedding and created many of the details alone or with the help of my family and friends. I didn't even have a wedding cake...my mom, a few aunts and myself made cupcakes of various flavors. The leftover cupcakes became entertainment later in the evening as a cupcake eating contest took place and quickly turned into a food fight.

I plan to do a more thorough post about my wedding when I track down and get more photos ready to publish. Besides, I've got to get my mind off weddings and hit the books.

Tuesday, January 11, 2011

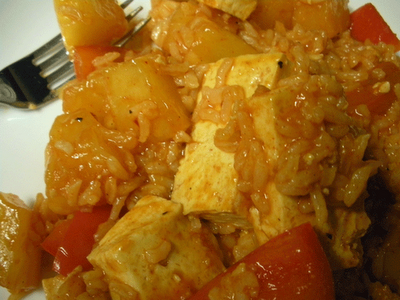
Sweet and Sour Tofu


I bought some canned pineapple the other day, and tonight I was determined to eat it with something. I had leftover tofu, rice, and half a red bell pepper in the fridge, so I searched the internet for sweet and sour tofu recipes.

I found and adapted this recipe from Eating Well.

I didn't have very high hopes for this dish, but I was pleasantly surprised. If you are looking for a replica to restaurant-style sweet and sour dishes, this is not it. However, I happily devoured a plateful. It was nice and satisfying but didn't leave me overly full and sluggish. And even better, it was quick and easy to make and helped me clear the fridge of leftovers.

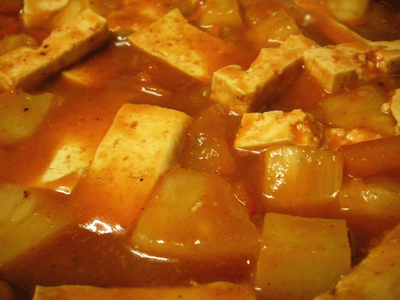
After I started eating, I realized that I forgot one important ingredient in any sweet and sour dish--the sweet part. A lot of the recipes I found called for brown sugar, but it completely slipped my mind. I think the dish turned out sweet enough for my tastes. It picked up some sweetness from the pineapple juice and the corn syrup in the ketchup and pepper paste (pic below). If you like yours sweeter, feel free to add some brown sugar or other sweetener. Sweet and sour dishes usually don't have a lot of spicy heat added to them, but I wanted some kick to mine. If you don't want the heat, omit or limit the amount of pepper paste/sauce and the red pepper flakes. Since I added both, my dish came out pretty spicy.


My husband won't eat tofu, but he was envious of the great smells coming from the kitchen. I'll definitely make this again soon. Maybe I'll make it with shrimp so he can enjoy it as well. I need to increase my knowledge and skill when it comes to Asian cookery, especially Chinese, because short of going to PF Chang's, our options for really good Chinese are slim to none. Also, by eating it at home, I can control the ingredients and make sure it stays relatively healthy.


Sweet and Sour Tofu

1/2 tbs sesame oil

1 tsp garlic, minced

1 tsp fresh ginger, finely grated

1 8-0z can pineapple chunks in juice

1/2-1 tbs white vinegar or rice wine vinegar

1/2-1 tbs ketchup

1-2 tsp soy sauce

1-1 1/2 tbs pepper sauce (I used Sunchang Gochujang, a Korean fermented red pepper paste)

1 cup extra-firm tofu, cubed

1/2-1 red and/or green bell pepper, roughly chopped

salt and freshly ground black pepper to taste

1/4 tsp red pepper flakes

1/2-1 tsp cornstarch

1-2 tbs cold water

rice for serving (I used leftover jasmine rice)

Heat a medium-size nonstick pan over low heat and add the oil, garlic, and ginger.

Meanwhile, in a small bowl, whisk together the juice from the canned pineapple with the next four ingredients to make the sauce (if you are using sugar, whisk it in as well).

Increase heat of pan to medium-high and add the tofu, bell pepper, salt and pepper. Stir-fry for 3-5 minutes and then add the sauce. Stir to combine and heat until it starts to boil. Add the pineapple chunks. Mix cornstarch with cold water and add to the pan. Let the sauce return to a boil, stir, and then reduce heat. Heat for a couple of more minutes and then serve hot over rice (I added the rice directly to the mixture since I was using leftover rice and don't currently have a microwave).

Monday, January 10, 2011

Brownies from Scratch


Last night I decided that the incoming snow was as good a reason as any to attempt to make homemade brownies. And by homemade, I mean from scratch...no mix.

I found a good-sounding recipe over at Goodlife Eats and gave it a try.

The brownies turned out wonderful. They were chocolately and a little fudgy. For the chocolate chunks called for in the recipe, I cut up part of a dark chocolate bar. For the extract called for, I used 1/2 tsp of vanilla. I sprinkled half of the brownies with a little sea salt before baking them. This was a success, although I think I prefer the plain ones. I don't like much fuss when it comes to brownies.

Snow Day


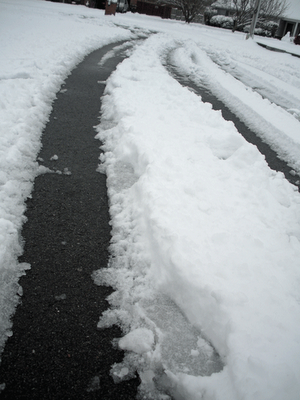
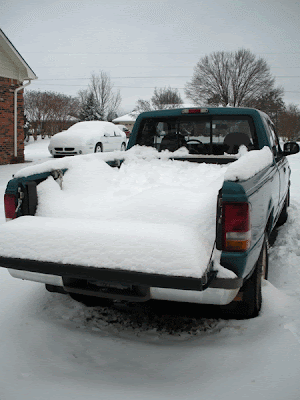
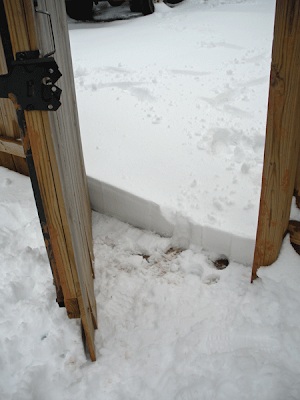
Seven to eight inches of snow was predicted, and we got it! I have never experienced so much snow. Before we went to bed last night, almost three inches had accumulated. That is how much we had on Christmas. There was at least seven inches when I got up at seven this morning to feed the critters, and it has snowed a little more since then.


The dogs had a blast again this time...


and so did Lee. He put on his snow goggles, rain/snow pants, and even pulled out his hiking poles.


We decided to make a snowman in the front yard and give him the goggles and poles. I had exactly one carrot in the fridge to use as a nose. The carrot would not go into the ball of snow, so I broke it in half and Lee put a screw in the carrot and then sawed off the head of the screw to have a sharp point to place into the snowman's head. It still won't stay in. It held long enough for a photo. Lee used nails for the eyes.


Someone had ventured out in a vehicle this morning. Later, several people on four-wheelers came down our street and into the cul-de-sac, driving around in circles and making a big mess of all the snow.

Here are a few more pictures to give you an idea of how much snow there is. Snow, especially this much snow, is a big deal for us here in Alabama. Frankly, I feel that I have seen enough. I'm ready for spring (minus the pollen).


Thursday, January 6, 2011

Hazelnut-crusted Tilapia with Lemon Basil Cream Sauce and Italian-style Green Beans


The other night Lee and I went to Carrabba's with friends, and I ordered the Trout Nocciola...trout crusted in hazelnuts and served with a lemon and basil butter cream sauce. On the side, I had Italian-style green beans. It was delicious. Lee had spaghetti with Italian sausage, but he kept stealing bites of my trout, so I decided to attempt the dish at home the next day for dinner. I substituted tilapia for trout because it was less expensive. I'll go ahead and tell you that it was a success!

The most difficult and frustrating part of the meal was preparing the hazelnuts. I went ahead and popped open the wine to help get me through it. This was the first time I've cooked with hazelnuts, and I did not anticipate them being so much trouble. I love hazelnuts, so it was well worth it.


First, I had to shell the darn things. The only type of nutcracker I own is for pecans, and it wasn't up to the task, so I pulled out the meat pounder. It worked well. I wound up placing the nuts right onto the countertop, and if I hit them with just the right force and at a slight angle, they would open up leaving a beautiful intact hazelnut. Be prepared for a mess if you try this. Hazelnuts were flying everywhere. The dogs and the cat quite enjoyed it.

After shelling them, I had to remove the thin, paperlike skins. I saw online that toasting them in the oven for 10-15 minutes at 350 degrees F was the key, so that's what I did. This releases some of their oil and gives them a great flavor too. After they came out of the oven, I used a kitchen towel to rub off the skins. Most of them came off easily, while a few didn't budge. If there was just a tiny bit of skin on one, I just scraped it off using my nails under the towel.

I pulled out the meat pounder again to crush them. I placed a few hazelnuts in the towel to keep them from flying off and pounded away. After a few pounds, I placed the nuts on a wooden cutting board and just pressed firmly with the meat pounder to achieve a finer consistency. Whew!


The wine I chose for tonight was Orvieto Classico. Orvieto is located in Umbria, which is adjacent to Tuscany. It was located among the Pinot Grigios, which was what I initially had in mind, but I decided to try something new. It was alright, but I think I prefer Pinot Grigio.


After I got the hazelnuts ready, I started making the sauce. I'm pretty handy with sauces, so this was a snap. Here's what I did:


Lemon Basil Cream Sauce

2 tbs salted butter

1-1 1/2 tbs freshly squeezed lemon juice

1 tbs vegetable stock (chicken stock or broth would work well also, I just had some leftover veggie stock handy)

1-1 1/2 tbs white wine

freshly ground black pepper to taste (optional...I add black pepper to everything)

1/2 tsp garlic, minced

1/2 cup heavy whipping cream

1-2 tsp lemon zest

1-2 tbs fresh basil leaves, torn


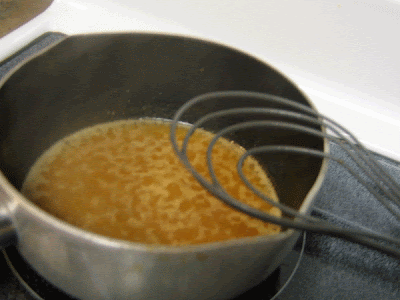
Melt the butter in a small pot over medium heat till slightly golden brown. Add the lemon juice, vegetable stock, wine, black pepper and garlic and cook on medium-low for 10-15 minutes or until reduced by about half. Whisk in cream until combined and reduce heat. Add lemon zest and stir. Sauce will thicken somewhat after it starts to cool. If it isn't as thick as you would like, you can thicken it up by first mixing some cornstarch or arrowroot (my favorite sauce thickener) with cool water and adding it to the sauce. If you add a thickener, bring the sauce back to a boil, and then reduce it again.

Add the basil to the sauce right before serving or just place it on top of the sauce when you plate (that's what I did). Since I still had to cook the fish and green beans, I left the sauce on the lowest setting to keep it warm.

(Serves 2-4)


Hazelnut-Crusted Tilapia

2-3 tbs extra virgin olive oil

1/2-3/4 cups toasted and crushed hazelnuts

1/2 cup panko (optional)

salt and freshly ground pepper to taste

1 egg white, whipped slightly

2 tilapia filets

1-2 roma tomatoes, seeded and cut into strips or chunks


Heat a medium-large size pan with lid on medium-high heat and add oil.

Dip fish into egg white and then into hazelnut/panko mixture, pressing so that it sticks. Place tomatoes into oil and stir. Add coated fish to pan and brown both sides. Reduce heat to medium or medium-low. Stir tomatoes and cover with lid. Cook for 5-10 minutes until fish is opaque throughout.

***I had to add additional oil to the pan, so next time I plan on adding some oil directly to the coated fish before placing in the pan.***

Serve fish hot covered with 1-2 tbs Lemon Basil Cream Sauce.

(Serves 2)


Italian-style Green Beans

1 tsp extra virgin olive oil

1 handful thin, French-style green beans (I buy them prewashed in bags)

1-2 roma tomatoes, seeded and roughly sliced or chopped

1-2 cloves pickled garlic, thinly sliced (use regular garlic if you don't have pickled)

salt and freshly ground pepper to taste

1/2 tbs or so balsamic vinegar (or other vinegar such as red wine vinegar)

1-3 tbs water, depending on how tender you like your green beans

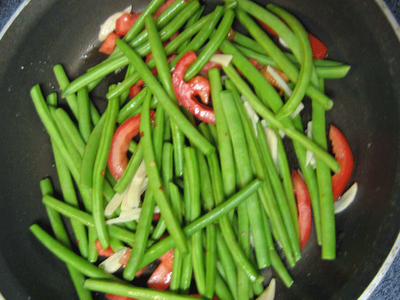
Heat oil in medium-sized pan over medium to medium-high heat. Add beans, tomatoes, garlic, and salt and pepper. Heat for 1-2 minutes, tossing occasionally. Add vinegar to deglaze pan and stir. Add water and cover with a lid, but leave it cracked just a bit so it steams. Cook until desired tenderness and serve hot or even at room temperature.

(Serves 2)

***I usually steam my green beans in the microwave, but we have been without one for several months. We are getting one built in over the stove, but it is requiring custom cabinetry, so it has become a much bigger project than anticipated. Heating up leftovers isn't as quick without one.***

This turned out to be a delicious meal worthy of serving to guests. The next time I make it I'm going to try to lighten it up a bit by omitting the cream and making a broth and wine-based sauce instead. I'll let you know how it goes.

Tuesday, January 4, 2011

Hoppin' John

Lee and I are getting tired of black-eyed peas and collard greens. I made way too many peas. I put some up in the freezer, and we have been eating them for dinner since Saturday. Tonight is the last night (until we get in the mood again and pull them out of the freezer). To make them more than just black-eyed peas tonight, I decided to make some hoppin' john.

I haven't made hoppin' john in years. I think the last time I made it I was trying to be vegetarian. This time I diced up some of the leftover New Year's ham for the dish.

Sorry there are no photos for this recipe either. I have misplaced the charger to my good camera, and I can't use my other cameras because all the AA batteries need recharging.


Hoppin' John

2 tsp or so extra virgin olive oil

1/4-1/2 cup ham, finely chopped

1/2 medium white onion, finely chopped

1/2 cup green bell pepper, finely chopped

1/2 cup red bell pepper, finely chopped

2-3 tbs vegetable broth

1 1/2-2 cups cooked black-eyed peas

salt and freshly ground pepper to taste

Tabasco sauce to taste (or other hot sauce if absolutely necessary)

cooked rice for serving (I used jasmine)


Heat oil in a pan over medium-high heat. Add the ham and cook until browned a bit. Add onion and bell peppers, stir, and cook for 5-10 minutes until slightly tender. Add broth, peas, Tabasco, and salt and pepper and cook for an additional 5-10 minutes until heated through.

Serve hot over rice.


Burlap Love


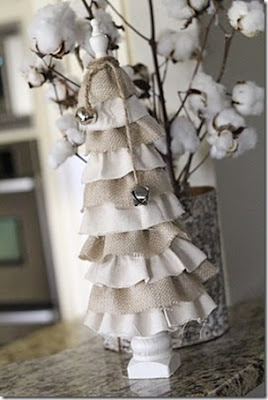
Alas, another holiday decoration. This one is from Ucreate.


I found this chair over at The Passionate Home. I have a chair I found at the thrift store that will be perfect for recovering in burlap. I could stencil our monogram on it or a design incorporating a dragonfly or two (another love of mine).


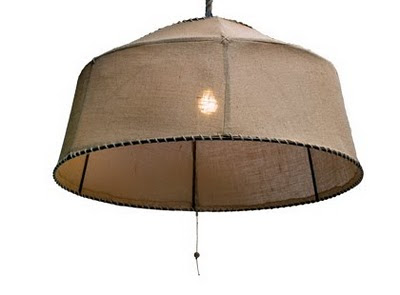
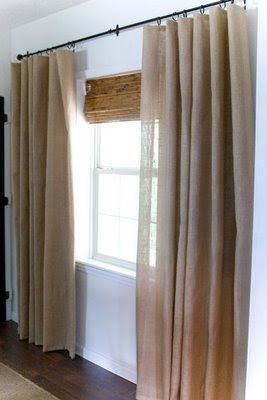
I don't have anywhere to put this hanging light fixture, but those curtains would be great in my dining room. I got both these images from Potato Boutique, a blog devoted to burlap. Go visit the site and check out all the amazing purses made from burlap potato sacks.


A burlap bulletin board is another project I could handle. I have a love for beautiful, organized workspaces too, even though I don't really work and can't get organized to save my life. This lovely workspace was found over at Designed to Shine.


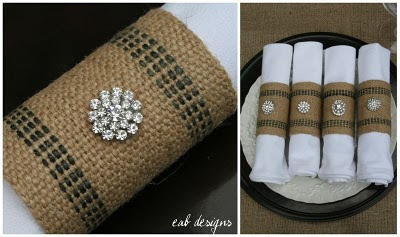
You can purchase these lovely napkin rings from EAB Designs. Check out the shop owner's beautiful blog here.


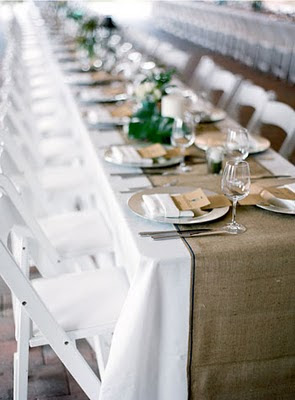
Burlap is being featured in many ways at weddings these days from tabecloths and tablerunners to invitations. The picture of this tablerunner was found at Young House Love, and these wedding invitations, which I wish I had thought of first, were found over at Love and Lavender. I designed my own wedding with a rustic style, but I never once thought of using burlap. It would have made a great addition. And it's inexpensive too!

Once I get all the other more important things marked off of my New Year's to-do list, I am going to make something burlap for the house.

Monday, January 3, 2011

Instead of Resolutions...

I'll make a New Year's to-do list. That way I can check things off as I go, and maybe I'll actually get some things done. And there are a lot of things I need (and want) to get done before I get into serious baby-making mode.


Here is a list of things, not necessarily in order of priority or practicality, that I can start with:


Make more lists/schedules

In order to get my house in order and keep it that way, I plan on creating a cleaning schedule that will include daily chores, weekly chores, monthly, etc... Believe me, I need this. The sheets haven't been getting washed once a week like they should, and the vacuuming isn't getting done enough to keep the dog odor at bay. Before baby I need to shed a few pounds and exercise in general to keep my mood in check, so I also need an exercise schedule or to-do list that I can cross off each day or couple of days. For example, checking off that I walked the dogs.


Wash all the piled-up laundry (and put it away...somewhere)

I have so many clothing items stuffed in laundry hampers outside the laundry room (yep, it's overflowing) that I forget what I have. Seriously, some clothing items have been in those hampers for over a year. A lot of it consists of items that have to be handwashed or otherwise washed delicately or drycleaned. It is really hard to get to these things when there is everyday laundry to do, but I will do it!


Hang pictures and decorative items

The walls in our house are bare, so I have been stocking up on inexpensive artwork and other decorative items to remedy this. However, I haven't hung any of them yet. Some of it has been sitting around collecting dust and taking up floor space for two years at least. Why haven't I hung them? I have two issues: trouble deciding where exactly to hang them and needing help to make sure they are level, spaced evenly apart, etc... I may have to call in some friends who have well decorated houses to come over and help.


Refinish dining table

We bought an antique drop-leaf table that has a rustic country style, but it is stained green. I want to remove the green stain and apply an medium brown oak stain. The dining table doesn't have much to do with having a baby, but after I'm pregnant I don't need to be fooling with chemicals like paint, stain, paint remover, etc... And after baby comes, there won't be much time.


Revamp the guest bathroom

The guest bathroom, which will become future baby's bathroom, is in pretty good shape but not very aesthetically pleasing. I want to remove the border, change the paint color, refinish the cabinets, add new hardware, add a new mirror and light fixture, add some shelves, find a small bench to place in there and purchase a new shower curtain and rug. I would really like to get a new sink and counterop too, but I want get my hopes up.


Use chalkboard paint

I really want a chalkboard wall in my house somewhere, and I have already purchased the paint as well as a magnetic primer to go underneath. I've already decided that future baby will have a wall or part of a wall as a chalkboard, but I think I want one in the kitchen as well. I can write grocery lists and other to-do lists on it.


Refinish future baby's furniture

I have a mid-century modern-style dresser and chest of drawers that I am going to strip and paint white to use in the nursery. The dresser will serve as a changing table as well. I got them both several years ago for only $75. I found two bedside tables for baby a year or so ago that I need to strip and paint white as well. They may not go in the room until baby gets a toddler bed, though.


Ready the nursery

This is the big one. This room is the definition of a mess. I posted pics of it here, and it is even worse now. It is mainly full of craft stuff like scrapbooking supplies, so organizing and finding a new home for that stuff is a major undertaking. I really want a space to do my crafting, but it needs to be behind closed doors to keep the animals away from it. I don't think Lee is going to give up his computer/music room any time soon, so I'll just have to steal a section of it for myself. I get sick to my stomach when even think about tackling this room, but it has got to be done. Wish me luck.

I have plenty to keep me busy. I'm currently back in school working on getting my elementary education degree, and I'm taking three more classes this semester that start a week from today. I think I need to add learn to manage my time to my to-do list.


Sunday, January 2, 2011

New Year's Greens and Black-eyed Peas

Last New Year's Day I had people over to watch football and eat collard greens and black-eyed peas. Eating black-eyed peas on New Year's Day is a tradition in the South, because they are thought to bring prosperity for the rest of the year. Do I believe this? Well of course not, but it's a fun tradition and I really like black-eyed peas. The day and the meal was a success, so I hosted it again this year.

It was the last football Saturday until Fall 2011, so lots of games were on, including Bama's bowl game (Roll Tide!), so football was on all afternoon (another Southern tradition any day football is on). We had three tv screens set up in the living room with three different games going at once.

I had dinner ready a little after five, and the food was even better this year. In addition to the greens and peas, I made cornbread, two lemon pies, cran-apple cider, and Lee bought a ham from Apple Lane Farms. Eating pork is also supposed to bring prosperity in the new year. I think I will host New Year's Day at our house every year.

I didn't take any photos of the food or anything else yesterday, but here is how I fixed up my fixings:


Collard Greens

1-2 tbs extra-virgin olive oil (canola or veg. oil would be fine)

pork neck bones (I used 4 pieces)

1-2 tbs apple cider vinegar

3 bundles collard greens; washed well, tough centers removed from leaves, roughly torn or cut into 2-3 inch pieces (each bundle contained 3-4 stalks of collards)

water

salt and freshly ground black pepper to taste

green pepper sauce for serving (optional); this sauce is thin and vinegary and found in clear glass bottles that contain small, whole green peppers


Before you begin, you may want to turn on your kitchen fan and/or open a couple of windows. Once you add the liquid to the hot pot of oil and neck bones, some smoke is to be expected.

Heat a large pot on high and add the oil. Add the neck bones, browning them on the two largest sides (watch out for hot oil splatter). Add the apple cider vinegar, and scrape the bottom of pot to deglaze.

Add the collard greens, stir well, and add just enough water to cover them (the greens will quickly shrink, and you don't want too much water because it will dilute the flavor).

Add some freshly ground black pepper and bring to a boil if not there already. Turn down the heat, but keep the greens moving. Boil for at least 3 hours. They should be quite tender before eating.

Add salt to taste and more pepper if necessary and serve.


Black-eyed Peas

1-2 tbs extra virgin olive oil (canola or veg. oil would be fine)

pork neck bones (I used 4 pieces)

3 bags dried black-eyed peas, soaked in plenty of water overnight in the fridge and then rinsed and picked over to remove any bad ones that stand out

water

salt and freshly ground pepper to taste


Before you begin, you may want to turn on your kitchen fan and/or open a couple of windows. Once you add the liquid to the hot pot of oil and neck bones, some smoke is to be expected.

Heat a large pot on high and add the oil. Add the neck bones, browning them on the two largest sides (watch out for hot oil splatter). Add a little bit of water, sraping the bottom of the pan to deglaze.

Add black-eyed peas, then add enough water so that the peas are covered with a 1/2 inch to 1 inch water on top.

Add freshly ground pepper.

Reduce heat to medium-low. Watch the peas carefully, reducing the heat when necessary so that they do not come to a full boil (trust me, if the peas boil they fall apart too quickly and they will not be good).

Simmer for 2-3 hours.

Add salt to taste and more pepper if necessary and serve.


Lemon Meringue Pie
(the way my mom has always made it)

1 can sweetened condensed milk like Eagle Brand (I have been using the fat-free version lately, and no one including myself can tell the difference)

1/2 cup bottled lemon juice (I once used fresh and it just wasn't the same)

2 eggs, separated

1/4 cup sugar

pinch of cream of tarter

1 graham cracker crust pie shell, like Keebler brand


Preheat oven to 325 degrees F.

For the filling:

In a bowl, add the sweetened condensed milk, lemon juice and 2 egg yolks. Mix well ( I use a whisk and/or a spoon) and set aside.

For the meringue:

In another bowl, add 2 egg whites, sugar, and cream of tarter. Beat with a mixer until creamy and fairly thick.

Pour lemon filling into pie shell. Using a rubber spatula, spread the meringue on top, trying not to get the lemon filling mixed into it (this is the hardest part for me).

Bake directly on the oven rack for about 20-30 minutes. The meringue should be a light golden brown at its peaks.

Place on a cooling rack so filling can set. Cool as long as you can wait (often only 5-10 minutes for me) and serve. I like my lemon pie on the warm side, but if you want yours cool or cold, place in the fridge before serving. Definitely refrigerate any leftover pie.


Cran-apple Cider
(I throw this together every New Year's Eve or New Year's Day using my memory for a now lost recipe I got from a former professor and friend)

1 three-liter container cran-apple juice (This year I also added a couple cups of cranberry-pomegranate juice I had on hand)

1/2 cup orange juice ( I use my morning OJ, not freshly squeezed)

5 family-size black tea bags (more or less depending on how you like it)

water (optional) (to cut strength of cider if needed)

several cinnamon sticks

small handfull of whole cloves

sugar or sugar substitute to taste (I used a handfull of stevia packets this time and the cider came out nicely)

fresh orange slices for garnish (optional)


Heat all juice in a large pot until hot (not boiling), and then add tea bags. Steep tea for 15-20 minutes. Remove tea bags and add remaining ingredients (I placed my whole cloves in a gadget used for steeping fresh tea leaves so I wouldn't have to strain the cider as it was served...I left it in for 20 minutes, and then I refilled it with a new bunch of whole cloves for the remainder). I added a little water, about 1 1/2 cups to thin it out a bit (this is a taste and adjust as I go recipe).

Serve warm to hot.

I served mine to my guests from a crockpot, because I needed the stove for the greens and peas. I kept the remaining cider that wouldn't fit in the crockpot in the 3-liter cran-apple juice container and refilled the crockpot when needed (also a great way to travel with your cider).


Mexican-style Cornbread
(another treat I whip up without a proper recipe)

1 box Jiffy brand cornbread mix (usually found at the grocery store near the cake/muffin mixes and not with the cornmeal)

1 egg

1/3 cup milk

a little salsa, a tablespoon or two

a little cheddar cheese (I used one slice of packaged sharp)

green tabasco sauce (I used a little less than a tablespoon, and it didn't produce a cornbread that was very spicy, so I will use 1-2 tablespoons next time) (I usually use a tablespoon or two of chopped jalopenos from a jar of sliced jalopenos, but I was out)

a pinch of salt and freshly ground black pepper


Combine cornbread mix, egg, and milk in a bowl. Stir in remaining ingredients.

Follow directions on cornbread mix package to cook cornbread.

Serve warm.